Creating ASP.Net Web API:s and generate clients with NSwag – Part 2

This is the second part of a two-post series about creating a Web API REST service written in ASP.Net Core and consuming it using the NSwag toolchain to automatically generate the C# client code.

The first part described how to set up the service and now it’s time to consume it by generating an API client using NSwag.

Note: We can use this method to consume any REST API that exposes a service description (i.e. a “swagger file”), we’re not at all limited to .Net Web API services.

Example code is available on GitHub.

Generating clients

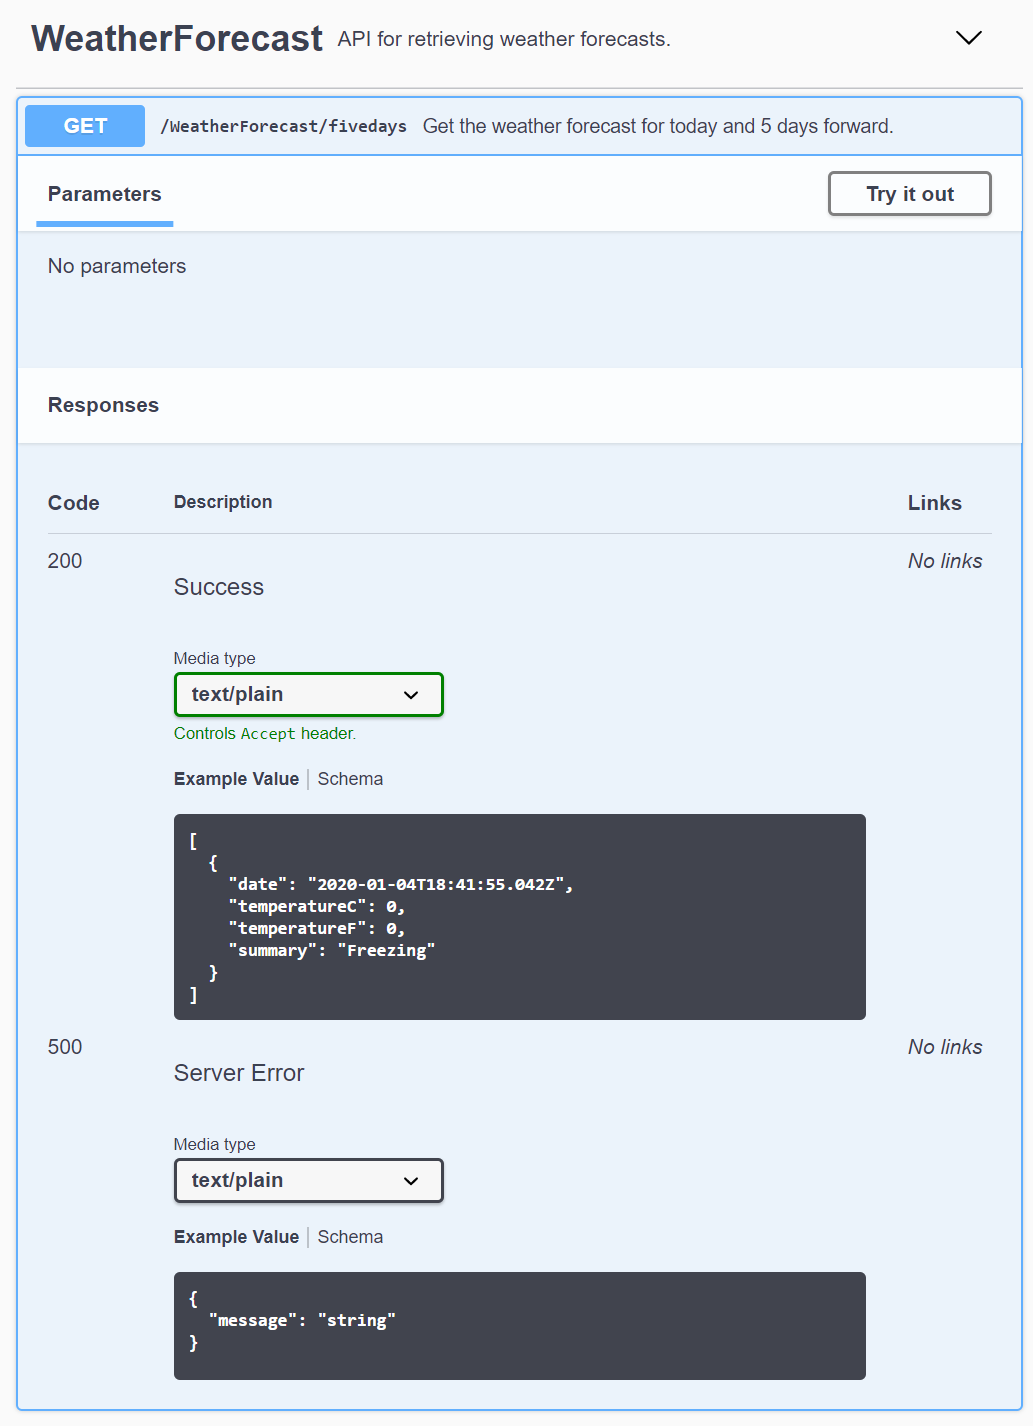
Once the service has a correct Swagger service description (the JSON file) we can start consuming the service by generating clients. There are several different tools for doing this and in this blog post I’ll use NSwag which is currently my favorite client generation tool as it’s very configurable and was built from the start for creating API clients for .Net.

NSwag has many options and can be used in two main ways:

  1. As a visual tool for Windows, called NSwagStudio
  2. As a command line tool, NSwag.exe, which is what I’ll describe here

NSwag.exe has many options so to make it easy to use it makes sense to create scripts that call the tool. The tool can also use saved definitions from NSwagStudio if that better suits your workflow, but I find it easier to just pass in all the options to NSwag.exe since it’s more transparent what settings are used.

Here’s how I currently use NSwag.exe to generate C# clients using a Powershell script:

function GenerateClient(
    $swaggerUrl,
    $apiNamespace,
    $apiName,
    $apiHelpersNamespace) {
    $apiHelpersNamespace = "${apiNamespace}.ApiHelpers"
    $clientFileName = "${apiName}Client.cs"
    $clientExtendedFileName = "${apiName}Client.Extended.cs"

    nswag openapi2csclient `
        "/Input:${swaggerUrl}" `
        "/Output:${clientFileName}" `
        "/Namespace:${apiNamespace}.${apiName}Api" `
        "/ClassName:${apiName}Client" `
        "/ClientBaseClass:${apiHelpersNamespace}.ApiClientBase" `
        "/GenerateClientInterfaces:true" `
        "/ConfigurationClass:${apiHelpersNamespace}.ApiConfiguration" `
        "/UseHttpClientCreationMethod:true" `
        "/InjectHttpClient:false" `
        "/UseHttpRequestMessageCreationMethod:false" `
        "/DateType:System.DateTime" `
        "/DateTimeType:System.DateTime" `
        "/GenerateExceptionClasses:false" `
        "/ExceptionClass:${apiHelpersNamespace}.ApiClientException"

    if ($LastExitCode) {
        write-host ""
        write-error "Client generation failed!"
    }
    else {
        write-host -foregroundcolor green "Updated API client: ${clientFileName}"

        if (-not (test-path $clientExtendedFileName)) {
            write-host ""
            write-host "Please create partial class '${clientExtendedFileName}' with overridden method to supply the service's base address:"
            write-host ""
            write-host -foregroundcolor yellow "`tprotected override Uri GetBaseAddress()"
            write-host ""
        }
    }
}

$apiName = 'Weather'
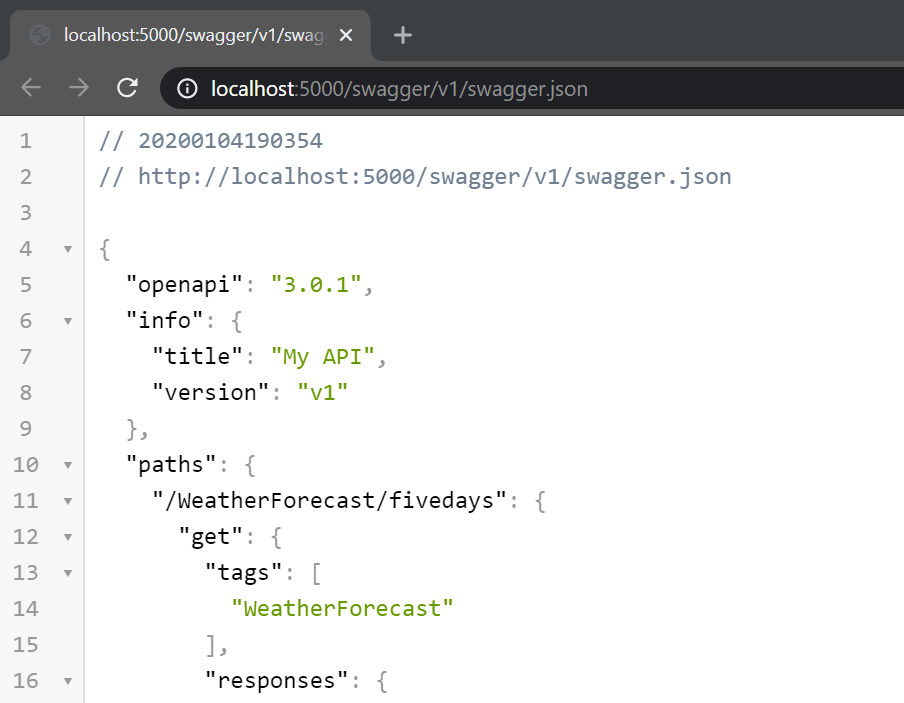
$swaggerUrl = 'http://localhost:5000/swagger/v1/swagger.json'
$apiNamespace = 'WebApiClientTestApp.Client'

GenerateClient $swaggerUrl $apiNamespace $apiName


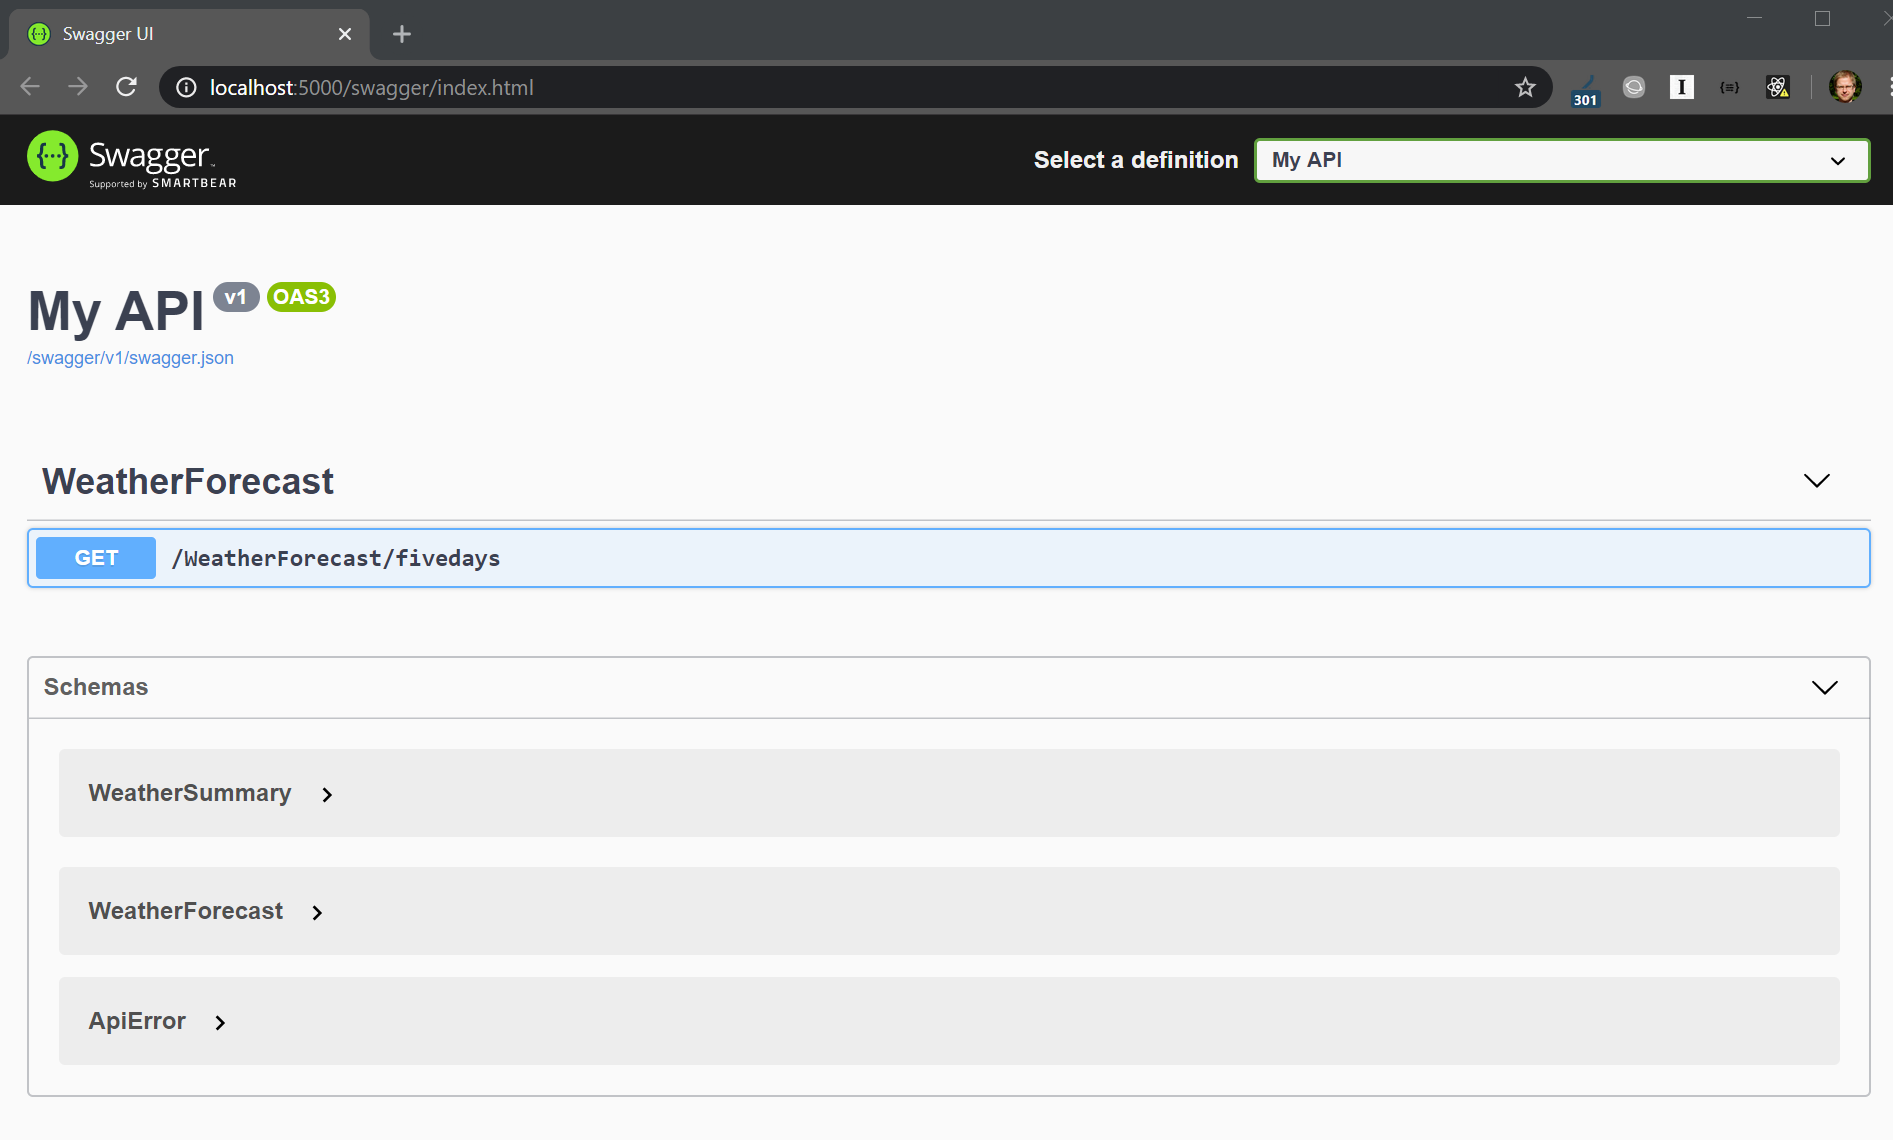
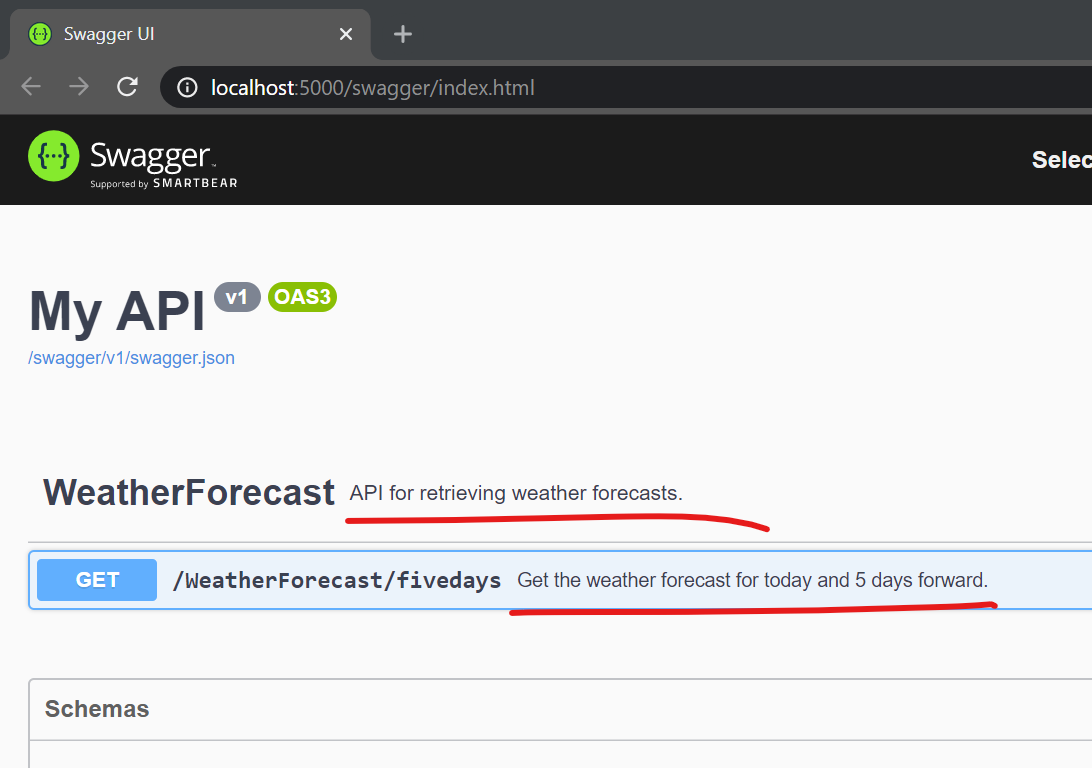
I use the openapi2csclient generator (called swagger2csclient in previous NSwag versions) to create a C# class for calling the REST API, based on the swagger.json file for the service.  Except for some obvious options for input and out paths, and class name and namespace, some of these options need a few words of explanation.

  • /GenerateClientInterfaces is used to generate a C# interface so that the client class can easily be mocked when writing unit tests on classes that call the client.
  • /ClientBaseClass is the name of a base class that the generated client class will inherit from. This is useful for collecting common code that should be performed for more than one API client, such as authentication, configuration or error handling. Depending on other options, this base class is expected to contain some predefined methods (see here for more details). This is an example of what the base class might look like:
public abstract class ApiClientBase
{
    protected readonly ApiConfiguration Configuration;

    protected ApiClientBase(ApiConfiguration configuration)
    {
        Configuration = configuration;
    }

    // Overridden by api client partial classes to set the base api url. 
    protected abstract Uri GetBaseAddress();

    // Used if "/UseHttpClientCreationMethod:true /InjectHttpClient:false" when running nswag to generate api clients.
    protected async Task<HttpClient> CreateHttpClientAsync(CancellationToken cancellationToken)
    {
        var httpClient = new HttpClient {BaseAddress = GetBaseAddress()};
        return await Task.FromResult(httpClient);
    }
}

  • /ConfigurationClass is the name of a class used to pass configuration data into Api client.
  • /InjectHttpClient:false and /UseHttpClientCreationMethod:true are used to give the base class control of how the Http Client instance is created which can be useful for setting default headers, authentication etc.
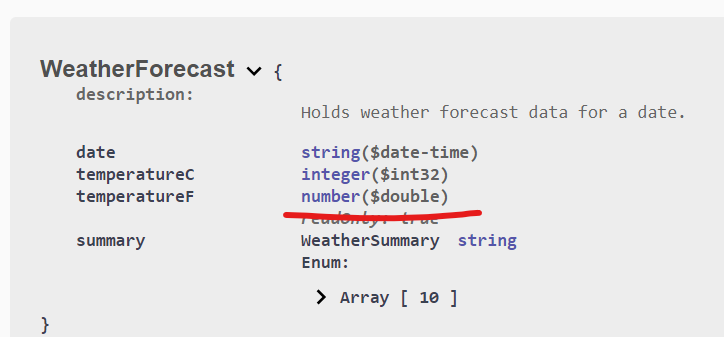
  • /DateType:System.DateTime and /DateTimeType:System.DateTime are used to create standard .Net DateTime types for dates rather than DateTimeOffset which NSwag for some reason seems to default to.
  • /GenerateExceptionClasses:false and /ExceptionClass are used to stop exception types from being generated for the APi client. The generated client will treat all 4xx and 5xx HTTP status codes on responses as errors and will throw an exception when it sees them. By using these options we can control the exception type so that all our generated API clients use the same exception type will greatly will simplify error handling.

The generated C# client is marked as partial which allows us to manually create a small file for supplying information to the base class:

public partial class WeatherClient
{
  protected override Uri GetBaseAddress()
  {
    return new Uri(Configuration.WeatherApiBaseUrl);
  }
}

And that’s all we need to generate the clients with full control over the error handling, HTTP client creation. To generate the client, start the service and run the above script and the client C# class is automatically generated.

Test project

To test this out, get the example code from GitHub. The solution contains to projects:

  • WebApiClientTestApp.Api – a service with an example endpoint
  • WebApiClientTestApp.Client – a console app with a client that call the service

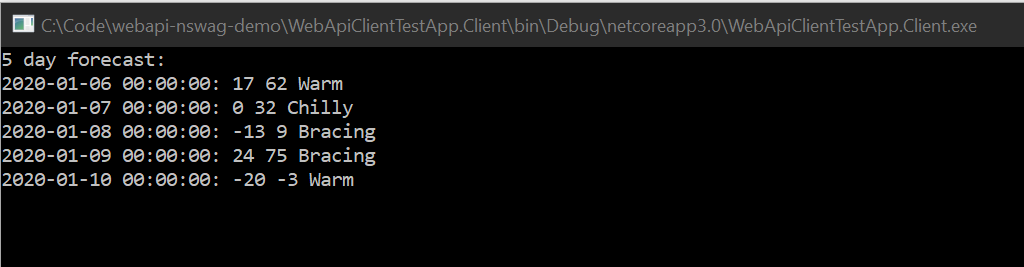
Starting first the Api project and then the Client project will print out the following in a command prompt:

Generating the client

To regenerate the client, first install NSwagStudio. Either the MSI installer or the Chocolatey installation method should be fine. Then start the Api project and open a Powershell prompt while the Api is running. Go to the Client project’s WeatherApi folder and type:

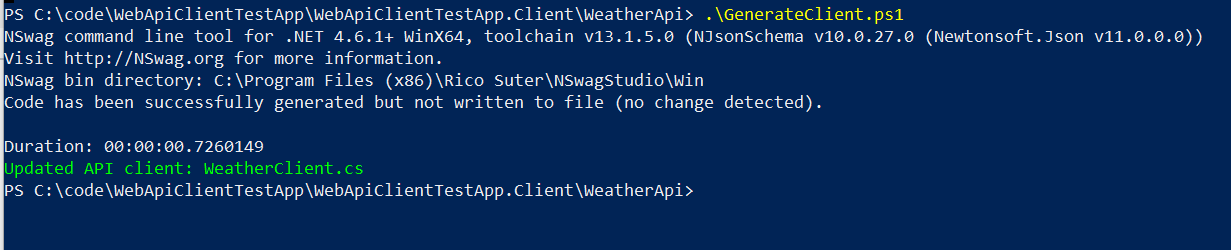
.\GenerateClient.ps1

The result should be something like this:

(If your output indicates an error you may have to run the Powershell as Administrator.)

The WeatherClient.cs file is now regenerated but unless the Api code is changed, the new version will be identical to the checked-in file. Try to delete it and regenerate it to see if it works.

The Powershell script can now be used every time the API is changed and the client needs to be updated.

Summary

By installing NSwagStudio and running the included console command nswag.exe, we are now able to generate an API client whenever we need to.

Note that the client generation described in this post is not limited to consuming .Net REST API:s, it can be used for any REST API that exposes service description files (swagger.json) properly, which makes this a very compelling pattern.

/Emil

Creating ASP.Net Web API:s and generate clients with NSwag – Part 1

This is the first part of a two-post series about creating a Web API REST service written in ASP.Net Core and consuming it using the NSwag toolchain to automatically generate the C# client code. This way of consuming a web service puts some requirements on the OpenAPI definition (previously known as Swagger definition) of the service so in this first part I’ll describe hot to properly set up a service so it can be consumed properly using NSwag.

The second part shows how to generate client code for the service.

Example code is available on GitHub.

Swashbuckle

When a new Web Api project (this post describes Asp.Net Core 3.0) is created in Visual Studio, it contains a working sample service but the code is missing a few crucial ingredients.

The most notable omission is that the service is missing an OpenAPI service description (also known as a Swagger description). On the .Net platform, such a service description is usually created automatically based on the API controllers and contracts using the Swashbuckle library.

This is how to install it and enable it in Asp.Net Core:

  1. Add a reference to the Swashbuckle.AspNetCore Nuget package (the example code uses version 5.0.0-rc5).
  2. Add the following to ConfigureServices(IServiceCollection services) in Startup.cs:
    services.AddSwaggerGen(c =>
      {
        c.SwaggerDoc("v1", new OpenApiInfo { Title = "My API", Version = "v1" });
      });
    
  3. Also add these lines to Configure(IApplicationBuilder app, IWebHostEnvironment env) in the same file:
    app.UseSwagger();
    app.UseSwaggerUI(c =>
      {
        c.SwaggerEndpoint($"/swagger/v1/swagger.json", ApiName);
      });
    

The first call enable the creation of the service description file and the second enables the UI for showing the endpoints with documentation and basic test functionality.

After starting the service, the description is available at this adress: /swagger/v1/swagger.json


More useful than this is the automatically created Swagger UI with documentation and basic endpoint testing features, found at /swagger:


Swashbuckle configuration

The service description is important for two reasons:

  1. It’s an always up-to-date documentation of the service
  2. It allows for generating API clients (data contracts and methods)

For both of these use cases it’s important that the service description is both complete and correct in the details. Swashbuckle does a reasonable job of creating a service description with default settings, but there are a few behaviors that need to be overridden to get the full client experience.

XML Comments

The endpoints and data contracts are not associated with any human-readable documentation and Swashbuckle has a feature that copies all XML comments from the code into the service description so that the documentation is much more complete.

To include the comments in the service description, the comments must first be saved to an XML file during project build, so that this file can be merged with the service description. This is done in the project settings:

After the path to the XML file to create is given in the XML documentation file field, Visual Studio will start to show warning CS1591 for public methods without an XML comment. This is most likely not the preferred behavior and the warning can be turned off by adding it to the Suppress warnings field as seen in the image above.

After the file is generated then it can be referenced by Swashbuckle in the Swagger setup by using the IncludeXmlComments option. This is an example of how to compose the path to the XML file and supply it to Swashbuckle inside ConfigureServices:

            services.AddSwaggerGen(c =>
            {
                c.SwaggerDoc("v1", new OpenApiInfo { Title = "My API", Version = "v1" });

                // Set the comments path for the Swagger JSON and UI.
                var xmlFile = $"{Assembly.GetExecutingAssembly().GetName().Name}.xml";
                var xmlPath = Path.Combine(_baseFolder, xmlFile);
                c.IncludeXmlComments(xmlPath, includeControllerXmlComments: true);
            });

The field _baseFolder is set like this in the Configure method:

        public void Configure(IApplicationBuilder app, IWebHostEnvironment env)
        {
            _baseFolder = env.ContentRootPath;
            ...
        }

The result should look like this:


Override data types

Some data types are not correctly preserved in the service description by default, for example the decimal type found in .Net, which is commonly used in financial applications. This can be fixed by overriding the behavior for those particular types.

This is how to set the options to serialize decimal values correctly in the call to AddSwaggerGen:

                // Mark decimal properties with the "decimal" format so client contracts can be correctly generated.
                c.MapType<decimal>(() => new OpenApiSchema { Type = "number", Format = "decimal" });
                c.MapType<decimal>(() => new OpenApiSchema { Type = "number", Format = "decimal" });

(This fix is from the discussion about a bug report for Swashbuckle.)

Before:

After:


Other service adjustments

In addition to adding and configuring Swashbuckle, there are a couple of other adjustments I like to make when creating services.

Serializing enums as strings

Enums are very useful in .Net when representing a limited number of values such as states, options, modes and similar. In .Net, enum values are normally just disguised integers which is evident in Web Api responses containing enum values, since they are returned as integers with unclear interpretation. Returning integers is not that descriptive so I typically configure my services to return enum values as strings. This is easiest done by setting an option for the API controllers in the ConfigureServices method in the Startup class:

services.AddControllers()
  .AddJsonOptions(options =>
    {
        // Serialize enums as string to be more readable and decrease
        // the risk of incorrect conversion of values.
        options.JsonSerializerOptions.Converters.Add(
            new JsonStringEnumConverter());
        });


Serializing dates as strings without time parts

In the .Net framework there is no data type for dates, so we’re normally relying on the good old DateTime also in cases where the time is irrelevant. This also means that API responses with dates often will contain time parts:

{
    "date": "2020-01-06T00:00:00+01:00",
    "temperatureC": 49,
    "temperatureF": 120,
    "summary": "Warm"
},

This is confusing and may lead to bugs because of the time zone specification part.

To fix this, we can create a Json serializer that extract the date from the DateTime value as described in this StackOverflow discussion.

public class ShortDateConverter : JsonConverter&lt;DateTime&gt;
{
  public override DateTime Read(ref Utf8JsonReader reader, Type typeToConvert, JsonSerializerOptions options)
  {
    return DateTime.Parse(reader.GetString());
  }

  public override void Write(Utf8JsonWriter writer, DateTime value, JsonSerializerOptions options)
  {
    writer.WriteStringValue(value.ToUniversalTime().ToString("yyyy-MM-dd"));
  }
}

The serializer must then be applied on the data contract properties as required:

public class WeatherForecast
{
  [JsonConverter(typeof(ShortDateConverter))]
  public DateTime Date { get; set; }
}

This is the result:

{
    "date": "2020-01-06",
    "temperatureC": 49,
    "temperatureF": 120,
    "summary": "Warm"
},

Much better. 🙂

Returning errors in a separate response type

In case of an error, information about it should be returned in a structured way just as any other content. I sometimes see added fields in the normal response types for error messages and similar but I think this is bad practice since it pullutes the data contracts with (generally) unused properties. It’s much clearer for the client if there is a specific data contract for returning errors, for example something like this:

{
  "errorMessage": "An unhandled error occurred."
}

Having separate contracts for normal responses and errors requires controller actions to return different types of values depending on whether there’s an error or not, and that the Swagger service description displays information about all the required types. Luckily Swashbuckle supports this well, as long as the return types are described using the ProducesResponseType attribute.

Here’s a complete controller action where we return different classes depending on if there’s an error or not:

        [HttpGet]
        [Route("fivedays")]
        [ProducesResponseType(
          statusCode: (int)HttpStatusCode.OK,
          type: typeof(IEnumerable<WeatherForecast>))]
        [ProducesResponseType(
          statusCode: (int)HttpStatusCode.InternalServerError,
          type: typeof(ApiError))]
        public ActionResult<IEnumerable<WeatherForecast>> Get()
        {
            try
            {
                var rng = new Random();
                return Enumerable.Range(1, 5)
                    .Select(index =&amp;amp;amp;amp;amp;gt; new WeatherForecast
                    {
                        Date = DateTime.Now.AddDays(index),
                        TemperatureC = rng.Next(-20, 55),
                        Summary = GetRandomSummary(rng)
                    }).ToArray();
            }
            catch (Exception ex)
            {
                _logger.LogError(ex, "Unhandled error");
                return StatusCode(
                    (int)HttpStatusCode.InternalServerError,
                    new ApiError { Message = "Server error" });
            }
        }

The Swagger page correctly displays the different data structures used for the different status codes:


Summary

This concludes the first part in this mini-series. We now have a complete Web Api service with the following properties:

  • A Swagger description file can be found at /swagger/v1/swagger.json
  • A Swagger documentation and testing page can be found at /swagger
  • Code comments are included in the service description
  • Enums are serialized as strings
  • Dates are serializes as short dates, without time part
  • Decimal values are correctly describes in the service description

In part 2 we show how we can consume this service in a client.

/Emil


Grouping by feature in ASP.Net MVC

Motivation

When I initially switched from using ASP.Net Web Forms to MVC as my standard technology for building web sites on the Microsoft stack I really liked the clean separation of the models, views and controllers. No more messy code-behind files with scattered business logic all over the place!

After a while though, I started to get kind of frustrated when editing the different parts of the code. I often find that a change in one type of file (e.g. the model) tend to result in corresponding changes in other related files (the view or the controller) and for any reasonably large project you’ll start to spend considerable time in the Solution Explorer trying to find the files that are affected by your modifications. It turns out that the default project structure of ASP.Net MVC actually does a pretty poor job of limiting change propagation between the files used by a certain feature. It’s still much better than Web Forms, but it’s by no means perfect.

The problem is that the default project structure separates the files by file type first and then by controller. This image shows the default project structure for ASP.Net MVC:

Default ASP.Net MVC project structure

Default ASP.Net MVC project structure

The interesting folders are Controllers, Models (which really should be called ViewModels) and Views. A given feature, for example the Index action on the Account controller, is implemented using files in all these folders and potentially also one or more files in the Scripts folder, if Javascript is used (which is very likely these days). Even if you need to make only a simple change, such as adding a property to the model and show it in a view, you’ll probably need to edit files in several of these directories which is fiddly since they are completely separated in the folder structure.

Wouldn’t it be much better to group files by feature instead? Yes, of course it would, when you think about it. Fortunately it’s quite easy to reconfigure ASP.Net MVC a bit to accomplish this. This is the goal:

Grouping by feature

Grouping by feature


Instead of the Controllers, Models and Views folders, we now have a Features folder. Each controller now has a separate sub-folder and each action method has a sub-folder of their own:

  • Features/
    • Controller1/
      • Action 1/
      • Action 2/
    • Controller2/
      • Action 1/
      • Action 2/

Each action folder contains the files needed for its implementation, such as the view, view model and specific Javascript files. The controller is stored on level up, in the controller folder.

What we accomplish by doing this is the following:

  1. All the files that are likely to be affected by a modification are stored together and are therefore much easier to find.
  2. It’s also easier to get an overview of the implementation of a feature and this in turn makes it easier to understand and work with the code base.
  3. It’s much easier to delete a feature and all related files. All that has to be done is to delete the action folder for the feature, and the corresponding controller action.

Implementation

After that rather long motivation, I’ll now show how to implement the group by feature structure. Luckily, it’s not very hard once you know the trick. This is what has to be done:

  1. Create a new folder called Features, and sub-folders for the controllers.
  2. Move the controller classes into their respective sub-folders. They don’t need to be changed in any way for this to work (although it might be nice to adjust their namespaces to reflect their new locations). It turns out that MVC does not assume that the controllers are located in any specific folder, they can be placed anywhere we like.
  3. Create sub-folders for each controller action and move their view files there. Rename the view files to View.html as there’s no need to reflect the action name in the file name anymore.

If you try to run your application at this point, you’ll get an error saying that the view cannot be found:

The view 'Index' or its master was not found or no view engine supports the searched locations. The following locations were searched:
~/Views/Home/Index.aspx
~/Views/Home/Index.ascx
~/Views/Shared/Index.aspx
~/Views/Shared/Index.ascx
~/Views/Home/Index.cshtml
~/Views/Home/Index.vbhtml
~/Views/Shared/Index.cshtml
~/Views/Shared/Index.vbhtml

This is exactly what we’d expect, as we just moved the files.

What we need to do is to tell MVC to look for the view files in their new locations and this can be accomplished by creating a custom view engine. That sounds much harder than it is, since we can simply inherit the standard Razor view engine and override its folder setup:

using System.Web.Mvc;

namespace RetailHouse.ePos.Web.Utils
{
    /// <summary>
    /// Modified from the suggestion at
    /// http://timgthomas.com/2013/10/feature-folders-in-asp-net-mvc/
    /// </summary>
    public class FeatureViewLocationRazorViewEngine : RazorViewEngine
    {
        public FeatureViewLocationRazorViewEngine()
        {
            var featureFolderViewLocationFormats = new[]
            {
                // First: Look in the feature folder
                "~/Features/{1}/{0}/View.cshtml",
                "~/Features/{1}/Shared/{0}.cshtml",
                "~/Features/Shared/{0}.cshtml",
                // If needed: standard  locations
                "~/Views/{1}/{0}.cshtml",
                "~/Views/Shared/{0}.cshtml"
            };

            ViewLocationFormats = featureFolderViewLocationFormats;
            MasterLocationFormats = featureFolderViewLocationFormats;
            PartialViewLocationFormats = featureFolderViewLocationFormats;
        }
    }
}

The above creates a view engine that searches the following folders in order (assuming the Url is /Foo/Index):

  1. ~/Features/Foo/Index/View.cshtml
  2. ~/Features/Foo/Shared/Index.cshtml
  3. ~/Features/Shared/Index/View.cshtml
  4. ~/Views/Foo/Index.cshtml
  5. ~/Views/Shared/Index.cshtml

The last two are just used for backward compatibility so that it isn’t necessary to refactor all controllers at once.

To use the new view engine, do the following on application startup:

ViewEngines.Engines.Clear();
ViewEngines.Engines.Add(new FeatureViewLocationRazorViewEngine());

The view will now load and the application will work as before, but with better structure.

The last step is to move view models and custom Javascript files into the action folders as well (note that the latter requires adjusting the paths in the HTML code that includes the Javascript files to reflect the new locations).

Once everything is up and running, the project becomes much easier to work with and when you get used to working like this you really start to wonder why Microsoft is not doing it by default in their Visual Studio templates. Maybe in a future version?

/Emil

Updates
2014-11-21 Updated the images to clarify the concept

Overriding the placement of validation error messages in knockout-validation

By default, knockout-validation places error messages just after the input element containing the error. This may not be what you want, and you can create UI elements of your own and bind them to validation error messages but this means writing a lot of boilerplate markup and it messes up the HTML. An alternative to this is to override the knockout-validation function that creates the error messages on the page. For example:

ko.validation.insertValidationMessage = function(element) {
    var span = document.createElement('SPAN');
    span.className = "myErrorClass";

    if ($(element).hasClass("error-before"))
        element.parentNode.insertBefore(span, element);
    else
        element.parentNode.insertBefore(span, element.nextSibling);

    return span;
};  

In this example I check whether the input element contains the custom class “error-before”, and if so, I move the error message to before rather than after the input field.

Another example, suitable for Bootstrap when using input groups:

ko.validation.insertValidationMessage = function(element) {
    var span = document.createElement('SPAN');
    span.className = "myErrorClass";

    var inputGroups = $(element).closest(".input-group");
    if (inputGroups.length > 0) {
        // We're in an input-group so we place the message after
        // the group rather than inside it in order to not break the design
        $(span).insertAfter(inputGroups);
    } else {
        // The default in knockout-validation
        element.parentNode.insertBefore(span, element.nextSibling);
    }
    return span;
};

One disadvantage of this is that we have no access to the knockout-validation options such as “errorMessageClass” so we have to hard code that value here (“myErrorClass” in the examples above.

/Emil

HTML 5 canvas performance experiment

I have started playing around with HTML 5 canvas to see what it can be used for and decided to test the performance with an old animated plasma-like demo effect that I used to do in my early days of programming some 20 years ago (I can’t believe I’m that old, how did that happen?).

Here’s a screen dump of the effect on a 600 by 400 pixel canvas:

Screen dump of the plasma effect in action

Here’s the page with the demo in real-life: http://www.meadow.se/codesamples/html5/canvasdemos/canvasdemo2.html

In Chrome I get a frame rate of about 18 frames per second on my Intel Core i7 2.70 GHz laptop with Mobile Intel graphics circuits. That’s okay I suppose, since most of the time is spent in the calculations of the color values using the following formula:

var r = Math.cos(animationOfffset + x/100 * y /100) * 255;
var g = Math.sin(animationOfffset + ((x * x) / 300) * (y / 300)) * 255;
var b = Math.cos(animationOfffset + (x-y) / 500) * 255;

This calculation has to be done for each of the (600 x 400 = 240 000) pixels in each frame. The limiting performance factor in this demo is definetely the CPU rather than the graphical performance of the canvas.

However, when I tried the demo in IE 9 on the same machine, I got about 5 fps! That’s 4 times slower! I have also tried the same demo with IE 10 and while that’s faster than IE 9, it’s still about 2.5 times slower than Chrome on the same machine.

All is not bad for IE though since it rendered the rotating text better. Comparing IE and Chrome side by side it’s obvious that IE has more stable text rendering, in Chrome the individual characters jiggle slightly when rotating the text. Once you notice it, it’s actually rather ugly.

I also tested the demo on my Samsung Galaxy S3 mobile and got 4 fps in Chrome and about the same in the built-in browser. About the same figures as for IE on my laptop. Not bad for a mobile phone…

To conclude, it’s apparently still very important to take the different browsers you’re running you’re Javascript and HTML 5 code on into account when developing web applications. It’s the 90s all over again… 😉

PS. If you try the demo yourself, feel free to post your frame rates in a comment to this post, It’ll be interesting to see how much it differs.

UPDATE 2012-12-06:

I have now tried replacing the calls to the Math.sin and Math.cos functions with pregenerated lookup tables (inspired by this code: Professor Cloud’s Fast Sine demo) and the new demo can be found here:

http://www.meadow.se/codesamples/html5/canvasdemos/canvasdemo2_LUT.html

I now get 42 fps in Chrome on my laptop, i.e. more than doubled performance, which is rather nice. However, the result in IE 9 is still only 5 fps, the same as before. So now Chrome is 8 times faster!

In Chrome on my Samsung Galaxy S3, the result is now 5 fps, also not a great improvement. The only deduction I can make from this is that for IE9 and Galaxy S3, it wasn’t the maths that limited the performance, but something else in the code. I don’t know what it might be so if anyone can shed some light on this it would really appreciated.

/Emil

Refreshing data in jQuery DataTables

Allan Jardine’s DataTables is a very powerful and slick jQuery plugin for displaying tabular data. It has many features and can do most of what you might want. One thing that’s curiously difficult though, is how to refresh the contents in a simple way, so I for my own reference, and possibly for the benefit of others as well, here’s a complete example of one way if doing this:

<table id="HelpdeskOverview">
  <thead>
    <tr>
      <th>Ärende</th>
      <th>Rapporterad</th>
      <th>Syst/Utr/Appl</th>
      <th>Prio</th>
      <th>Rubrik</th>
      <th>Status</th>
      <th>Ägare</th>
    </tr>
  </thead>
  <tbody> 
  </tbody> 
</table>
function InitOverviewDataTable() {
    oOverviewTable = $('#HelpdeskOverview').dataTable(
        {
            bPaginate: true,
            bJQueryUI: true, // ThemeRoller-stöd
            bLengthChange: false,
            bFilter: false,
            bSort: false,
            bInfo: true,
            bAutoWidth: true,
            bProcessing: true,
            iDisplayLength: 10,
            sAjaxSource: '/Helpdesk/ActiveCases/noacceptancetest',
            fnRowCallback: formatRow
        });
}
function RefreshTable(tableId, urlData) {
    //oSettings.sAjaxSource?
    $.getJSON(urlData,
        null, function (json) {
            table = $(tableId).dataTable();
            oSettings = table.fnSettings();

            table.fnClearTable(this);
            for (var i = 0; i < json.aaData.length; i++) {
                table.oApi._fnAddData(oSettings, json.aaData[i]);
            }
            oSettings.aiDisplay = oSettings.aiDisplayMaster.slice();
            table.fnDraw();
        });
}
function AutoReload() {
    RefreshTable('#HelpdeskOverview', '/Helpdesk/ActiveCases/noacceptancetest');

    setTimeout(function () { AutoReload(); }, 30000);
}
$(document).ready(function () {
    InitOverviewDataTable();
    setTimeout(function () {
           AutoReload();
        },
        30000);
});